Windows 11 and 10 have less user interface control over operating system update behaviour than previous versions of Windows. In Windows 11 and 10, there is no way to turn off the Windows Update option using the Control Panel or Settings app; it automatically checks for updates and installs any it finds, whether you like it or not. For most users, this new feature is actually very convenient. If you want to control the update process, you can disable the Windows Update Service. This involves opening the Service Manager, finding the service and changing its startup parameters and status. Then, whenever you want the operating system to check for updates, you'll have to enable the service again (which doesn't seem that easy).
We can try Windows Update Blocker, a free programme I found that helps you to completely disable or enable automatic updates on your Windows system. If you put your programme files in an external data device, you can take Windows Update Blocker anywhere and use it on any computer you come into contact with.
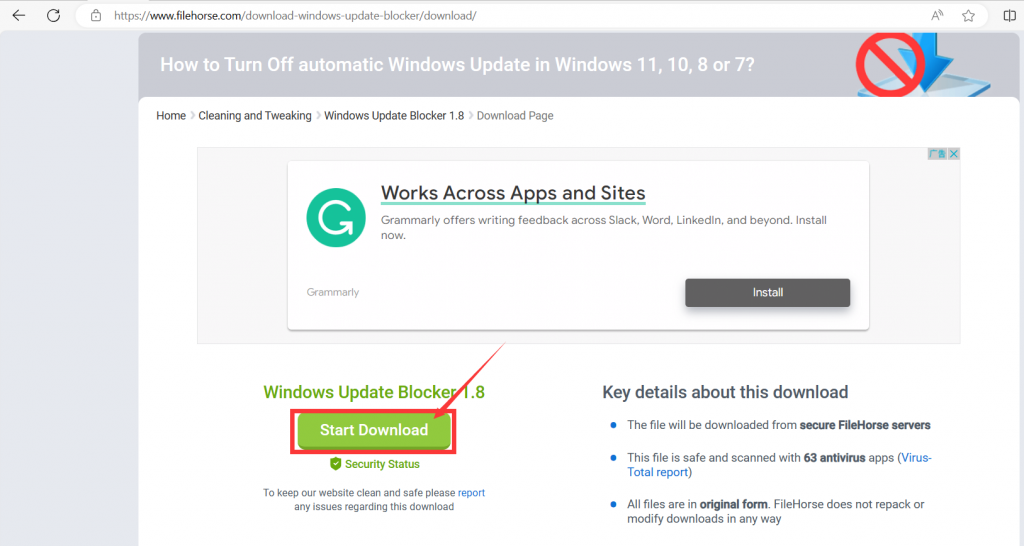
1. Windows Update Blocker download location:https://www.filehorse.com/download-w...cker/download/
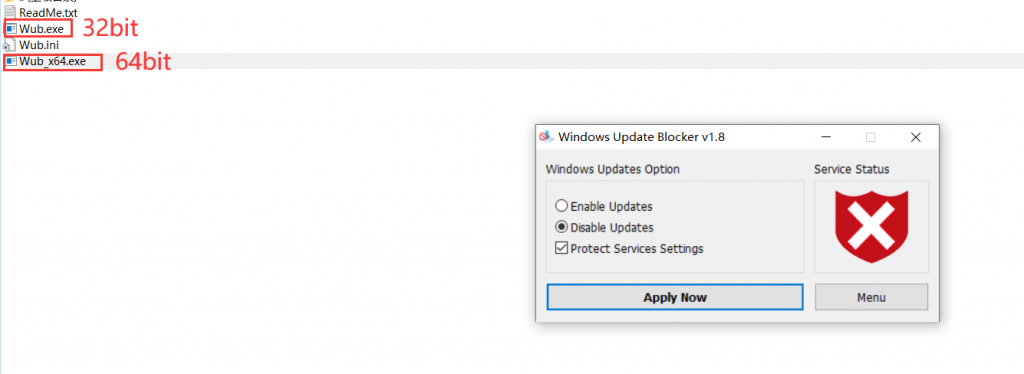
2. After downloading, unzip and run the corresponding exe file according to the operating system version. 32-bit system choose Wub.exe, 64-bit system choose Wub_Double click X64.exe to run.
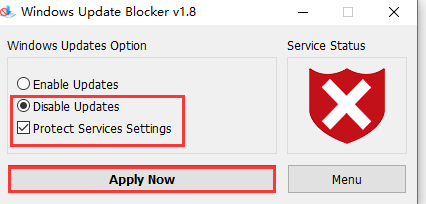
3. After entering Windows Update Blocker,check Disable Updates, Protect Services Settings, and select Apply Now.
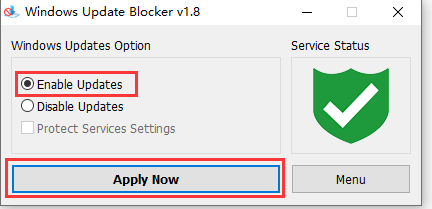
4. If you need to activate the update function, you can run "Windows Update Blocker" again, check "Enable Updates", and select "Apply Now" to activate the update function.
I've written a lot of similar tutorials, so you can see my support interface.